I’d say having one of your children fly the nest brings a mixed bag of emotions. It’s a time of change and of growth and it’s also a natural progression in life, we aren’t destined to live with our parents forever, although that might solve the housing shortage in this country – but that’s another story. I am immensely proud that my eldest son has managed to secure himself a flat in Surrey, quite a tall order considering the extortionate price of property in this area and also the fact that he is buying on his own as a current singleton. I miss him being here but he isn’t far away and at least now when we do see him it’s nice to make a concentrated effort to chat and catch up rather than a quick chat before he disappears into his room to do whatever on his games console.
So this led me to the thought that I am now part of a household with a spare room! An exciting prospect indeed and a perfect time for a little redecorating and creativity to make his bedroom into an inviting and cosy guest room for any guests that we may have…not that we have many guests and particularly not overnight ones, but that is probably because we didn’t have a spare room – before now.
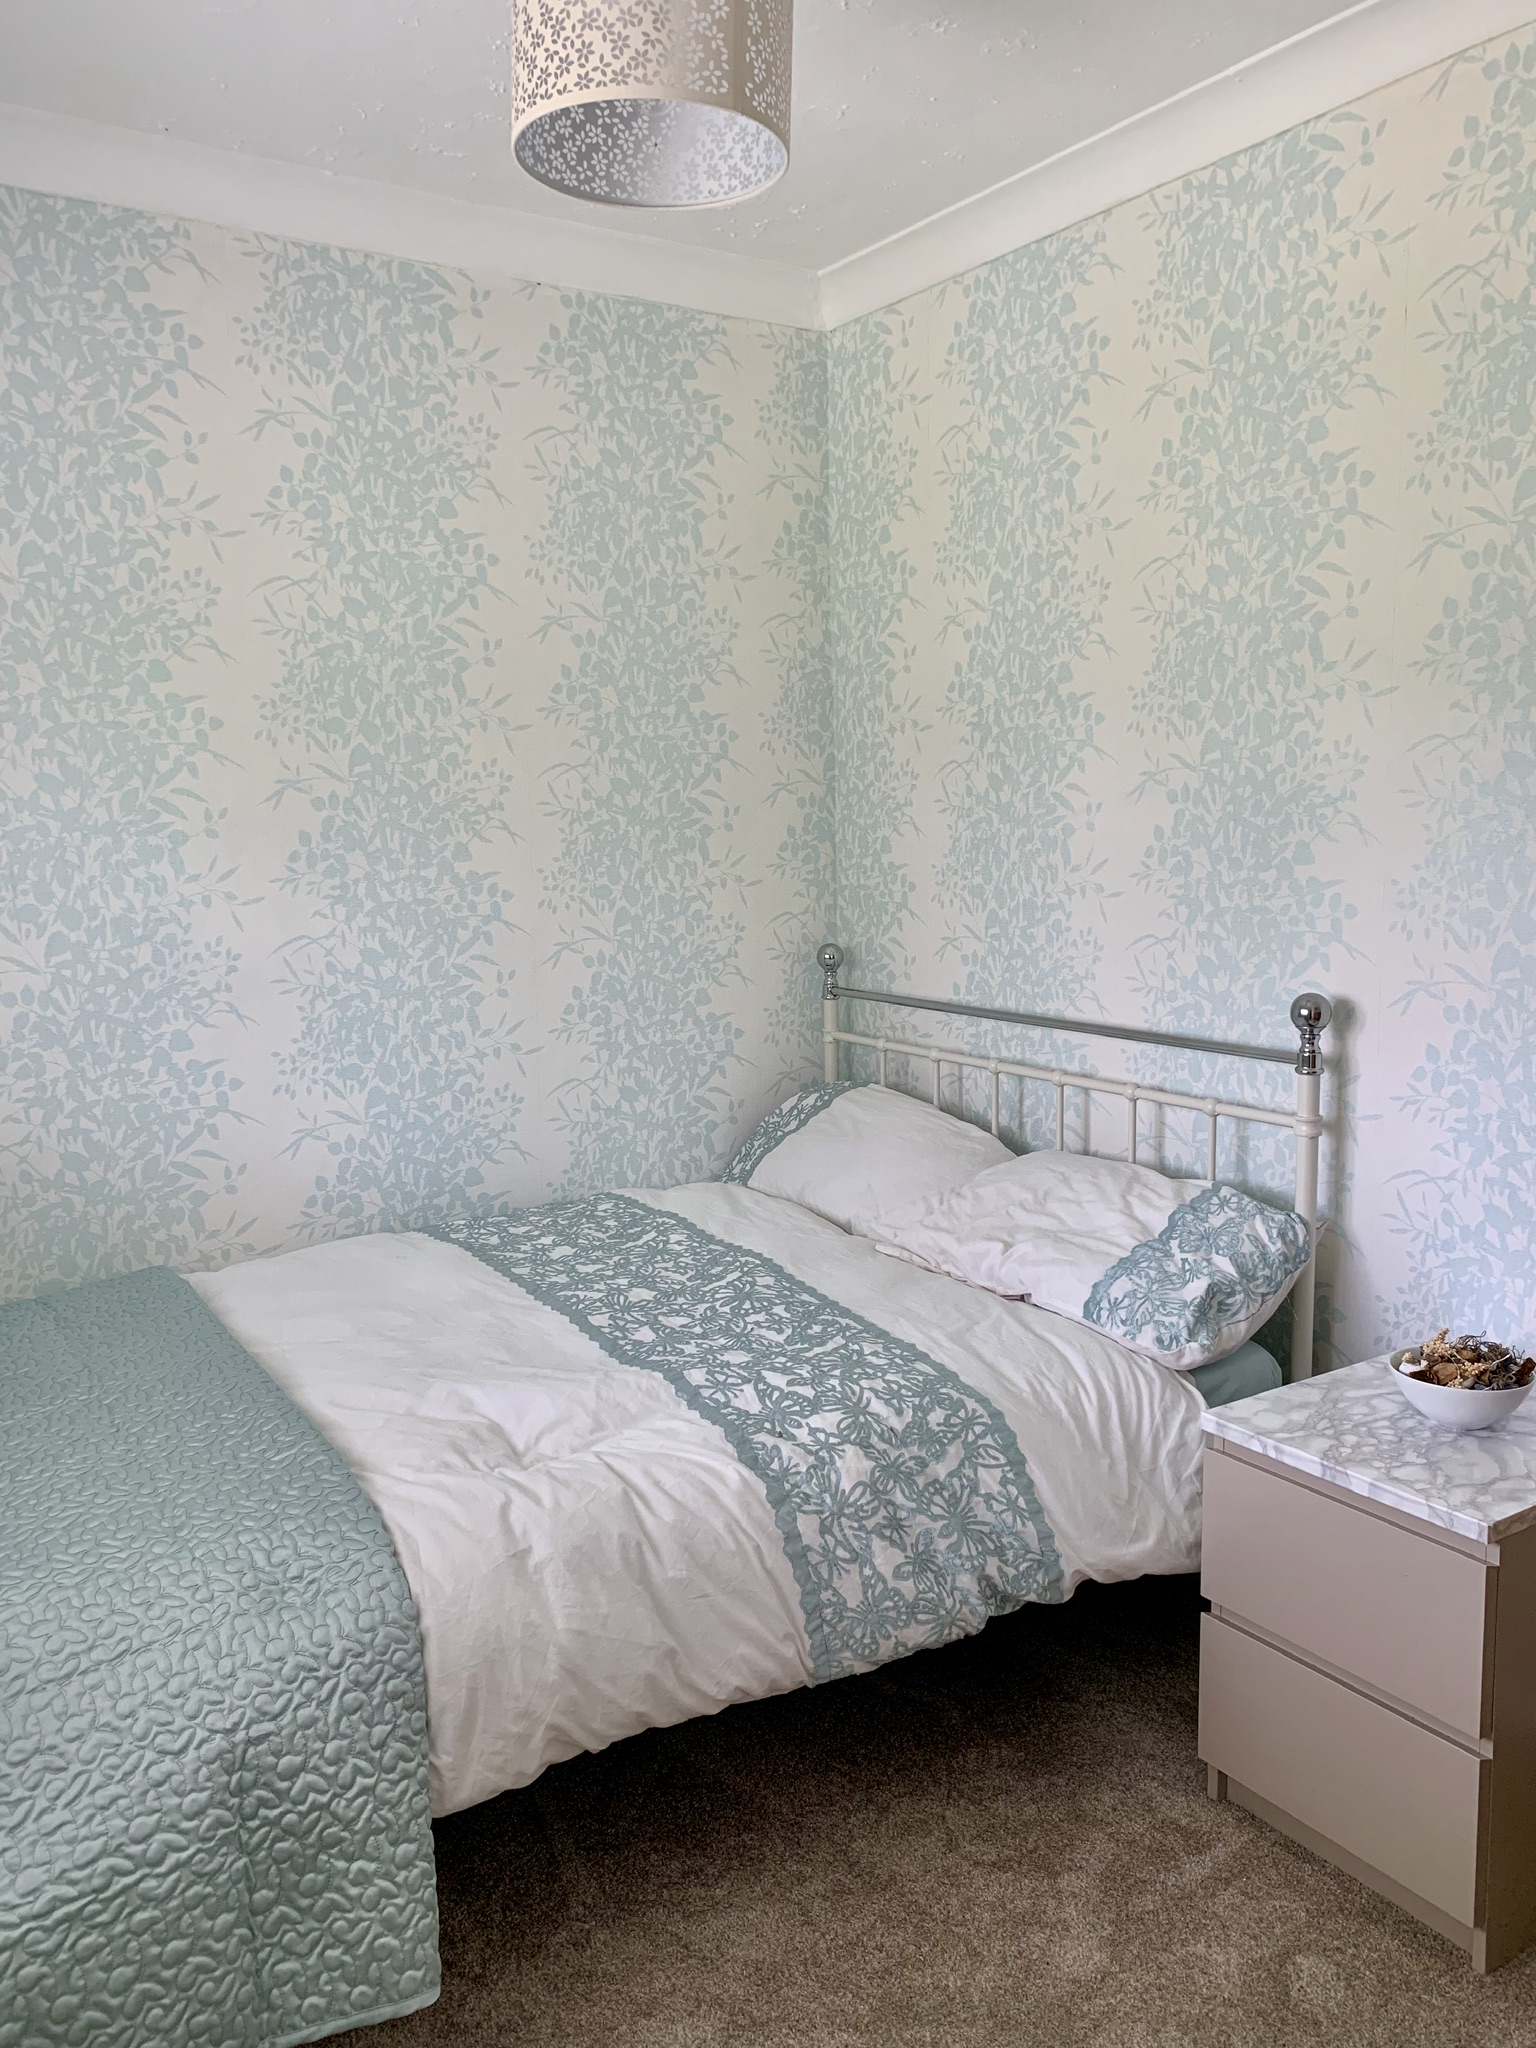
The bedroom is pretty small, only about 8′ by 9′ foot which is probably pretty average for the smallest bedroom isn’t it? My son had managed to cram a double bed in, two chests of drawers and two sets of Billy bookshelves, plus a massive TV on the wall and his x-box, there wasn’t much room for anything else. When we moved in the room was painted pink and blue so we had just painted it a neutral colour as a temporary measure, with good intentions to redecorate at some point. Well that point didn’t come until now.
So what were the jobs we needed to do? After removing the wallpaper we discovered that the walls really weren’t that great, therefore we decided to opt for wallpaper rather just painting over the walls. The house is about sixty years old and I don’t think any house over a few years old is going to have marvellous walls.
The first things to do were what I call the boring bits, I just like to get to the nitty gritty but when you are decorating it is really important to prepare the room properly first. So as well as stripping off every tiny bit of the old paper, we also needed to clean the paintwork on the ceiling and paint over it and sand down the skirting board and door and gloss those too. It pains me to say it but it does look better when you prep it properly first. I’m quite impatient though and don’t enjoy that stuff, I just like it when it’s nearly finished so I can make it look pretty, back me up here girls I’m sure most of you get my drift!
We chose some wallpaper that looked quite ‘fresh’ and ‘clean’ if that makes sense, the main colour was cream with greeny grey leaves so a nice subtle pattern with a nature feel which just felt right. Well neither of us had wallpapered in years so that was a bit of a learning curve, especially as the wallpaper that didn’t have much of a pattern actually turned out that it had enough of a pattern that each length needed matching up. We did end up wasting quite a lot which might have been avoidable had we cut the first length before applying it, but hindsight is a wonderful thing isn’t it? It took us nearly all day as well!
After the ceiling, door, skirting and walls were done came the more enjoyable part! We were fortunate that we had managed to save a little bit of money so had a small amount to spend on accessories. Because of the size of the room we decided to get a small double bed and bought one from my catalogue, on buy now pay later, we bought a pretty lampshade for the ceiling, got some gorgeous bedding from an online store and a remnant of carpet from our local carpet shop. We bought an absolutely beautiful clock and filled a simple white bowl with some pot pourri. I put a vase in there with some fabric flowers and I have ordered a pretty print from the catalogue too. I think I might like to put a couple of shelves up or at least buy some more artwork for the walls, just to make it feel really special, I also may get a bedside lamp. Honestly I know it’s probably the wrong thing to say but I love doing all this bit – the finishing touches – far more than the decorating itself.
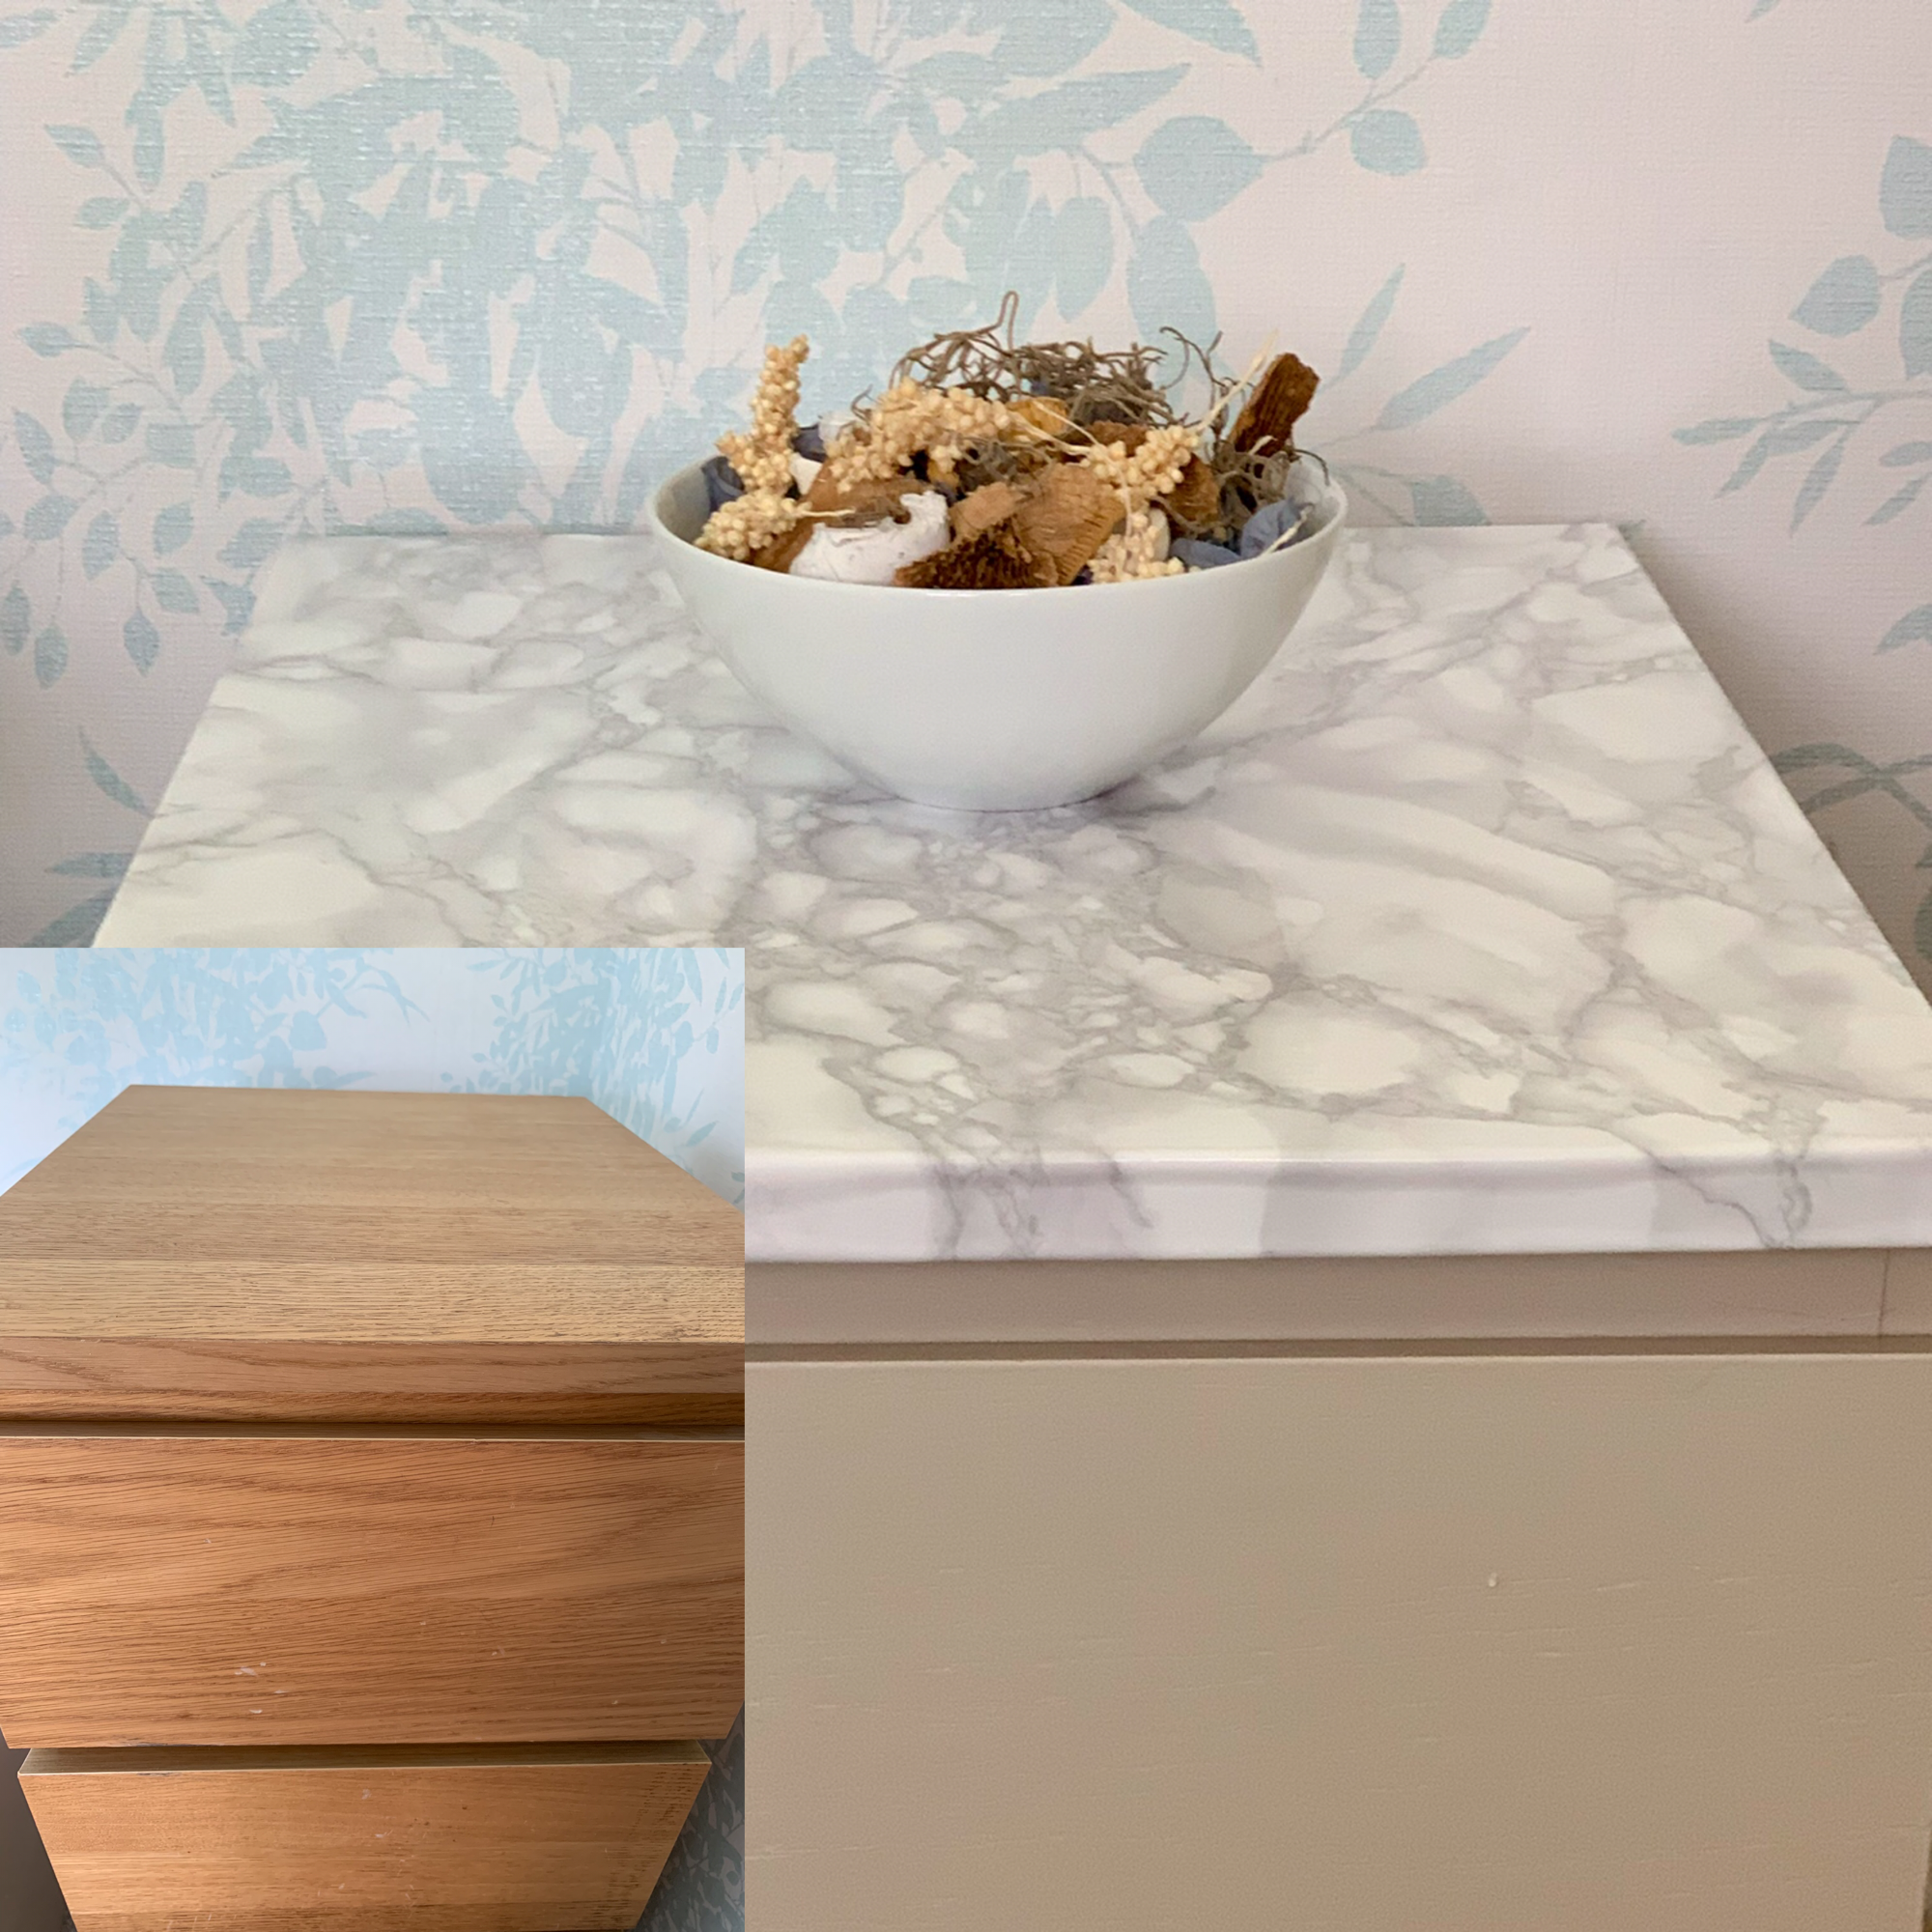
My son had left his chest of drawers and bedside cabinet (which were Ikea, so pretty good but a little bit dated) so we painted them with some universal paint and put some marble effect sticky back plastic on the top. We used the same type of paint to improve our UPVC front door which worked a treat, see here for a pic Front door revamp I am really pleased how they have turned out and actually really really love the room, now we just need to find a visitor to test it out!!
You may also like to see our other bedroom transformation where I have added some tips to easily change the look of a room Bedroom makeover ideas and tips


So I really liked the design you went with – but I have to ask – why did you put the bed up against the corner like that? As a spare room wouldn’t it be better to have both sides of the bed open for couple guests?
LikeLiked by 1 person
Hi Stephanie thank you for reading, I am glad you like the design. The room is quite small and I would have preferred the bed in the middle of the room but unfortunately there isn’t enough room to put it in the middle. If it went the other way round you wouldn’t be able to open the door. Pain I know!
LikeLike
That’s a beautiful room! What a great transformation of the bed side table too. I’m thinking of adding some marble print to the top of my Ikea Kallax units 🙂
LikeLiked by 1 person
Ahh thank you so much!! It was quite easy to do and makes a big difference, good luck with it I bet it will look amazing 🙂
LikeLiked by 1 person
It looks lovely. Our spare room always ends up doubling as storage, laundry overflow, office and general mess room, so I’d love a room like this
LikeLiked by 1 person
Thank you so much, I am quite pleased with how it’s turned out!
LikeLike